
1987 Kawasaki KLR250 Sales Brochure


 If there is any one thing that new KLR250 owners ask the most it would be where to get a service or repair manual. While most motorcycle owners can easily order a new Clymer or Haynes repair manual for their bike the KLR 250 dual sport owners aren't so lucky. You see, Clymer and Haynes have never made a service manual for the KLR Jr, nor do they ever intend to. That leaves KLR250 enthusiasts with just one option, a factory service manual. Unfortunately even that isn't so easy because Kawasaki never made an all-in-one KLR250 specific repair manual. Instead KLR 250 owners are forced to buy a KLR600 "base" repair manual and also a KLR250 "supplement" manual. That wouldn't be so bad if both manuals were readily available and at a reasonable price but most owners are left to search ebay for months on end hoping to snatch one up. Thankfully this is no longer a problem as members of the KLR650.net forums have made both manuals available in PDF format! You can download them
 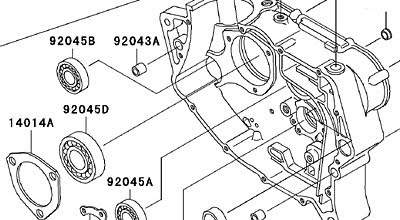 The only thing worse than buying a used bike and finding that its missing parts is not being able to figure out exactly which parts are missing or how they install on the bike. That's where parts diagrams come in handy. Thankfully Kawasaki has released the parts diagrams for the KLR250 to the public so anyone can see how their bike is supposed to be assembled. Below you'll find all the part diagrams for the Kawasaki KLR250. Some part numbers may have changed from year to year so its best to check with your local dealer before order parts for your bike.
 What was changed from 85-05?
 If you were to browse any KLR250 related forum the most common ailment you'd hear owners complain about is some type of starting or running problem, usually carburetor related. These problems aren't biased to just the KLR, any carbureted bike can experience them. They're usually due to dirt in the fuel clogging a jet, or varish gumming everything up. The only solution is to remove the carb from the bike and give it a thorough cleaning and inspection. Thats what this article is meant to do, show you the basics of the KLR250 carburetor and give a quick run through on how to clean it.We won't get into how a carb works, but if you're interested in learning more check out The Care and Feeding of the Keihn Carb.
 The KLR 250 comes with a Keihn CVK34 carburetor. Don't let the parts diagram to the left fool you, CVK34 is a very simple design. To clean the carb you'll need to remove it from the bike. Probably one of the more painful processes whenever you have to work on your bike's carb is trying to get it out of the bike. At the very least it'll require removing the side plastics, seat, and fuel tank, though we have found that unbolting the exhaust muffler and the top bolts of the subframe (the part the seat bolts to) make things easier by allowing you to pivot the entire subframe backwards giving better access to the carb. Once you've gotten to the carb follow these steps to disconnect and remove it.
 Teardown:
 Float Adjustment:
 Trying to figure out why your KLR250's headlights no longer work or your turn signals stopped blinking? One of the most commonly asked for items in any KLR forum is for a wiring diagram. Its not that the KLRs had a lot of electrical problems, rather its more about some of these bikes being over 20 years old. In that time connections corrode and switches wear out, and the only way to diagnose the electrical bug your bike has is by using a wire diagram. Anyway, enough talking, just click the image to the left to enlarge it.


